


Introduction: Why I Decided to Test This AI-Powered Development Platform
As someone who’s spent years watching the low-code/no-code revolution unfold, I’ve become increasingly skeptical of platforms that promise the world but deliver rigid, vendor-locked solutions. When I first heard about Visual Paradigm AI App Studio and its claim to build production-ready applications in hours rather than months, I’ll admit—I was doubtful.
But here’s the thing: my company needed an internal IT helpdesk system, and our development team was booked solid for the next quarter. I decided to put this platform to the test, documenting every step of my experience building a fully functional application using Visual Paradigm App Studio, Google AI Studio, and Vercel. What follows is my honest, hands-on review of whether this data-driven AI approach lives up to the hype.
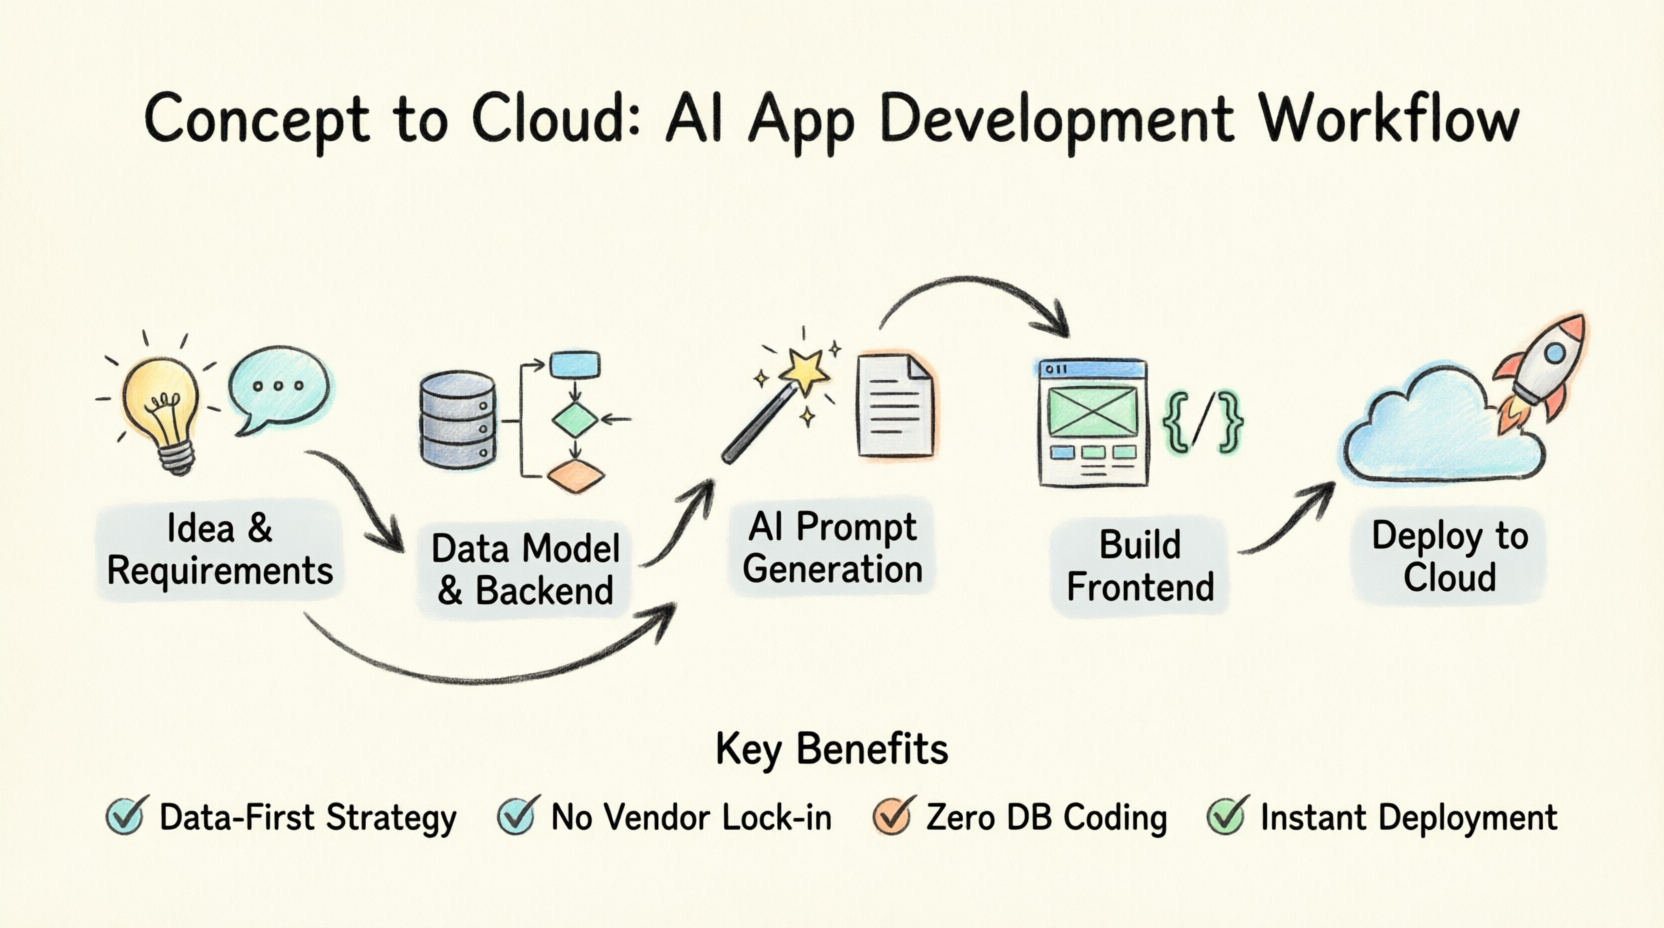
The All-New AI App Studio: A Fresh Perspective
Build Stable Apps Faster with a Data-First Strategy
What immediately caught my attention about AI App Studio is how it fundamentally flips the traditional app development model. Most app builders I’ve tested force you to design visual screens first, which often traps your data and limits flexibility down the road. Visual Paradigm takes a different approach—they focus entirely on establishing a solid data foundation first.
The platform automatically builds your backend database structure and hands you a perfect coding blueprint. By launching a secure, live cloud database before you even touch the visual design, they give AI coding tools a clear map to follow. This eliminates guesswork, prevents broken connections, and delivers stable, secure software that’s ready to run.
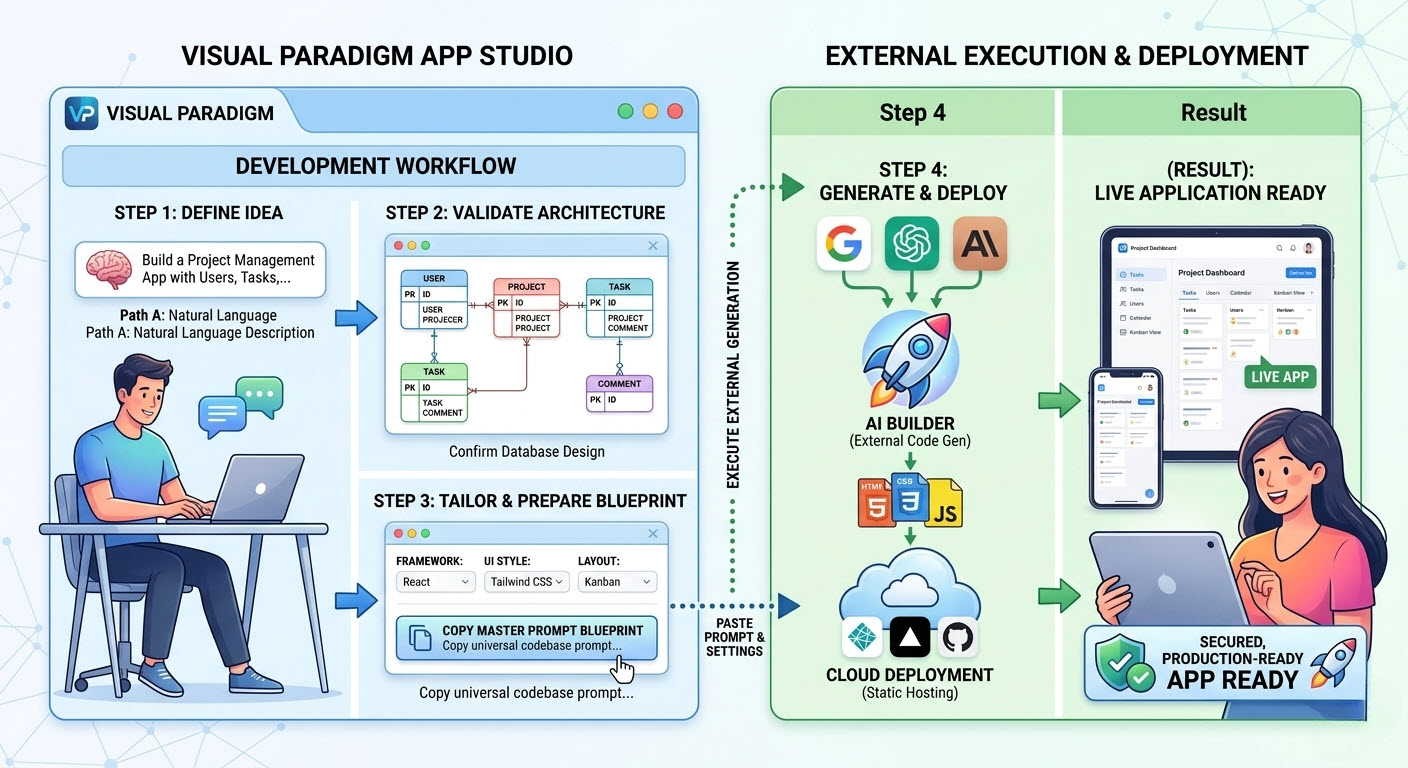
My First Impressions of the Interface
The workflow is refreshingly straightforward:
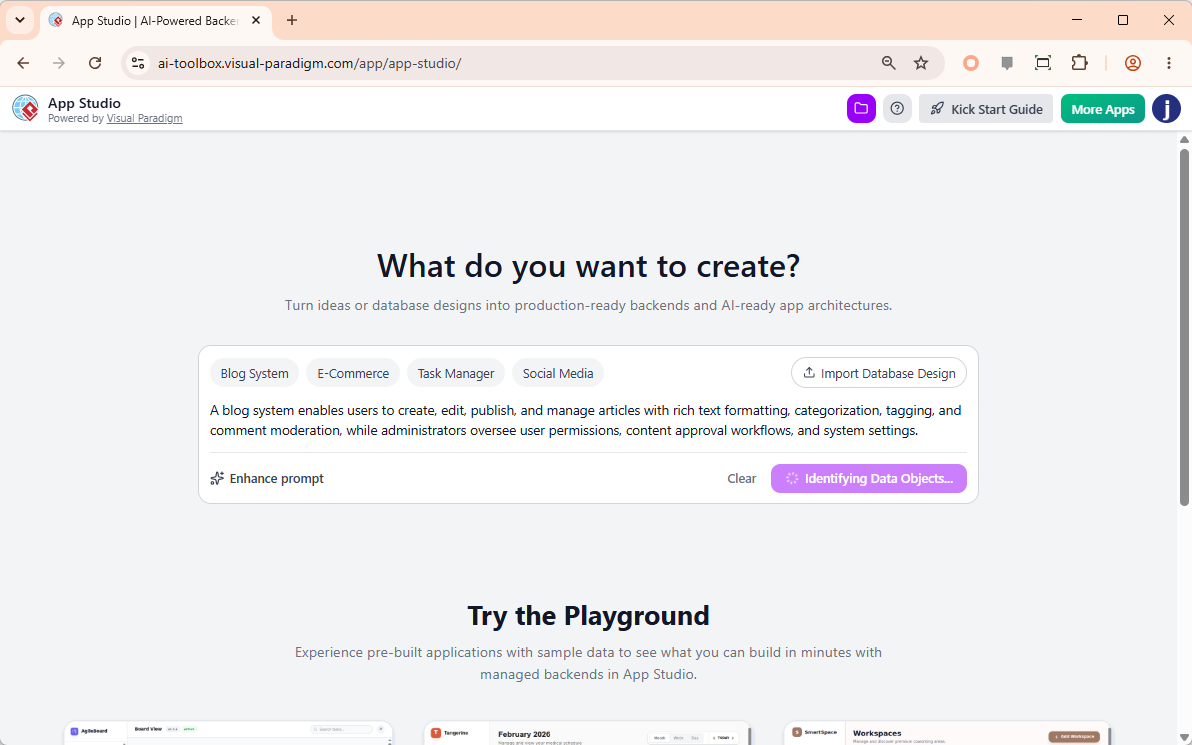
Enter App Requirement Description
Review Data Design
Set Up Backend
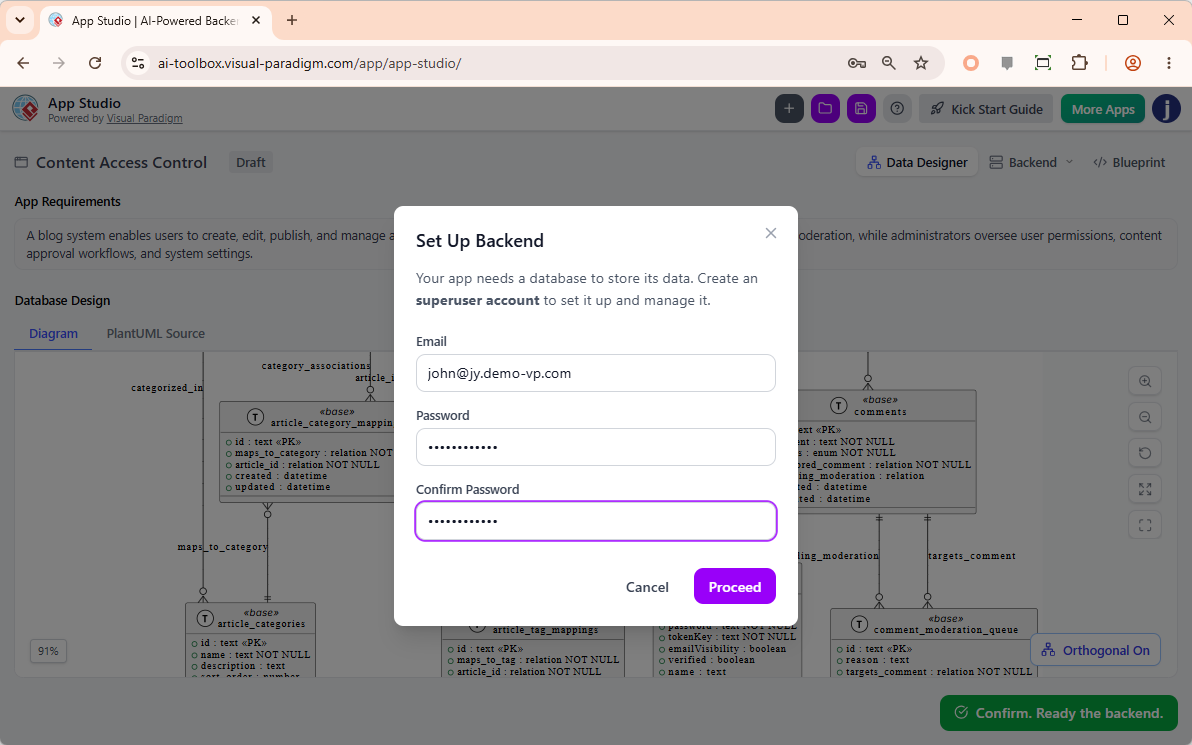
Adjust Style and Theme
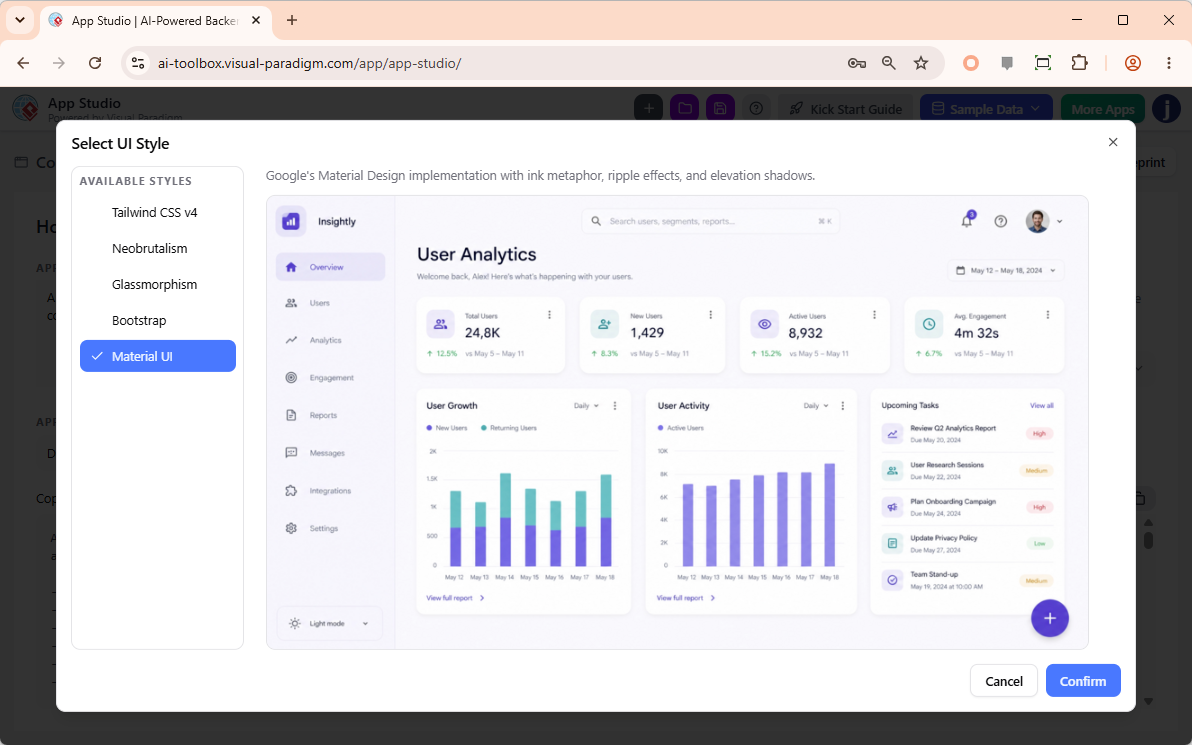
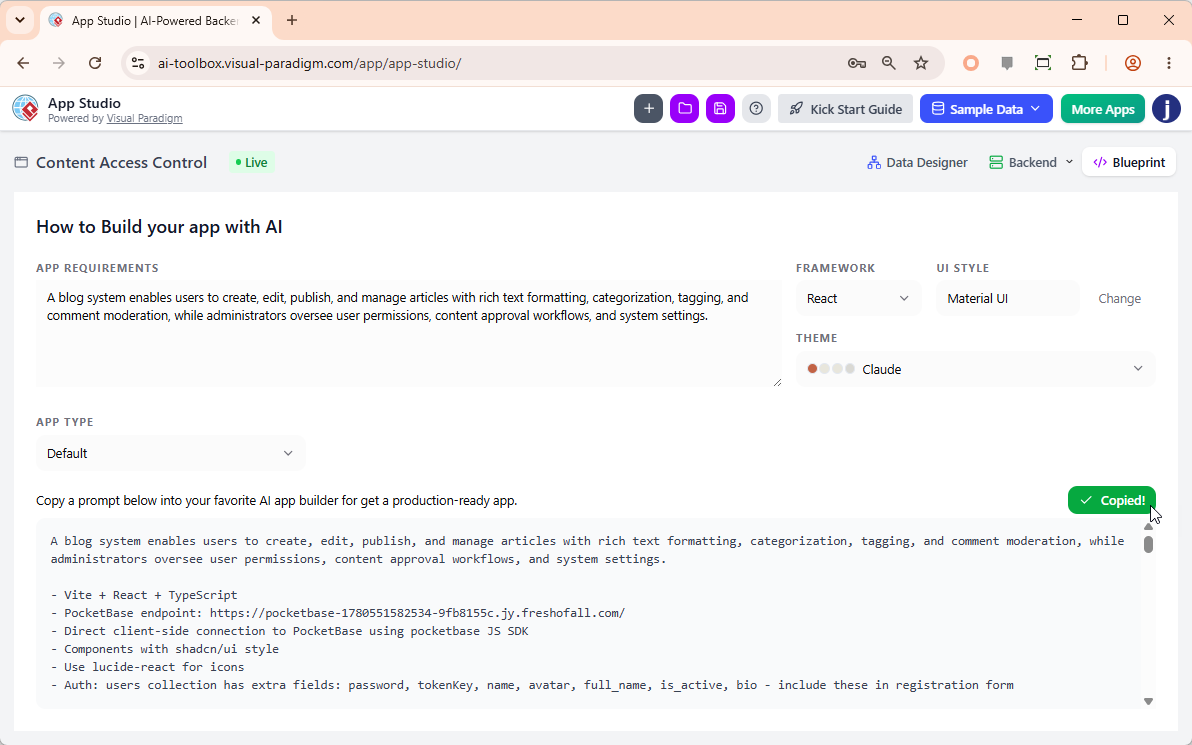
Copy The Suggested Prompt
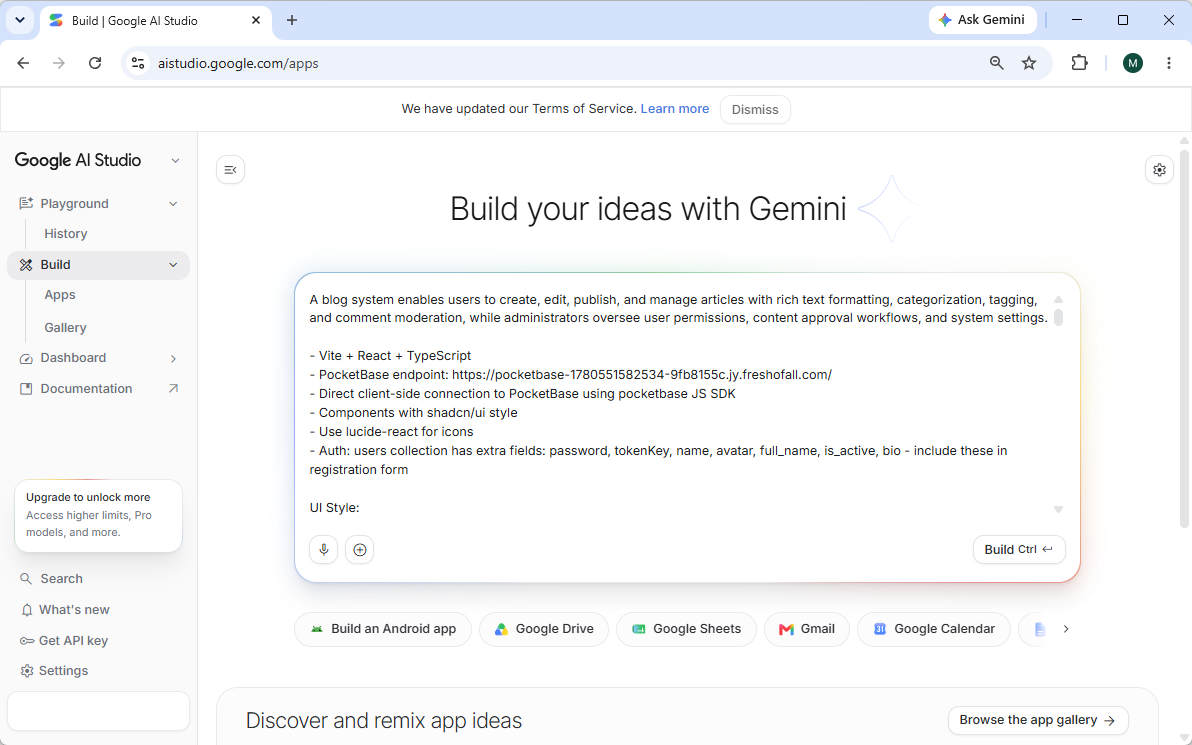
Build the App with your Favorite Building Tool
The App is now Built
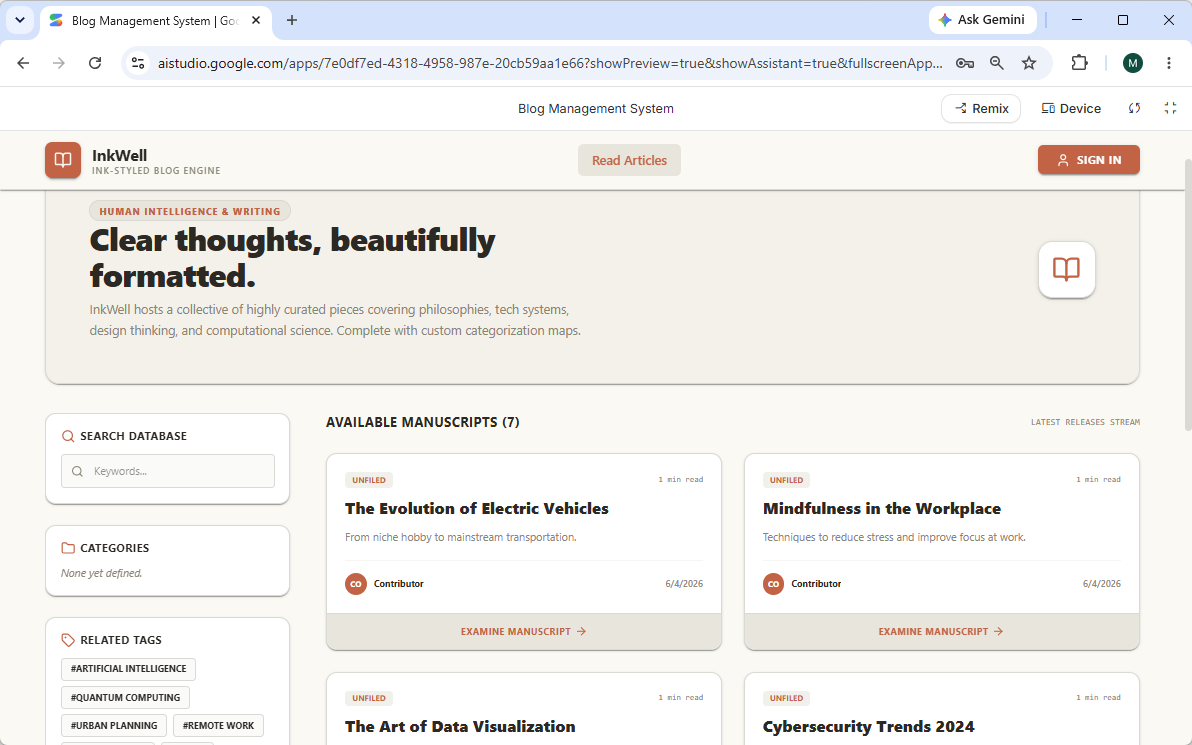
How It Works: My Step-by-Step Experience
Going from Idea to Functional App
Here’s how the process actually unfolded for me:
1. Input Your Idea
I started by describing my application concept in plain English. There was no need for complex technical specifications—just telling the AI what I wanted the app to do. This was surprisingly liberating after years of writing detailed technical requirements.
2. Generate the Data Model
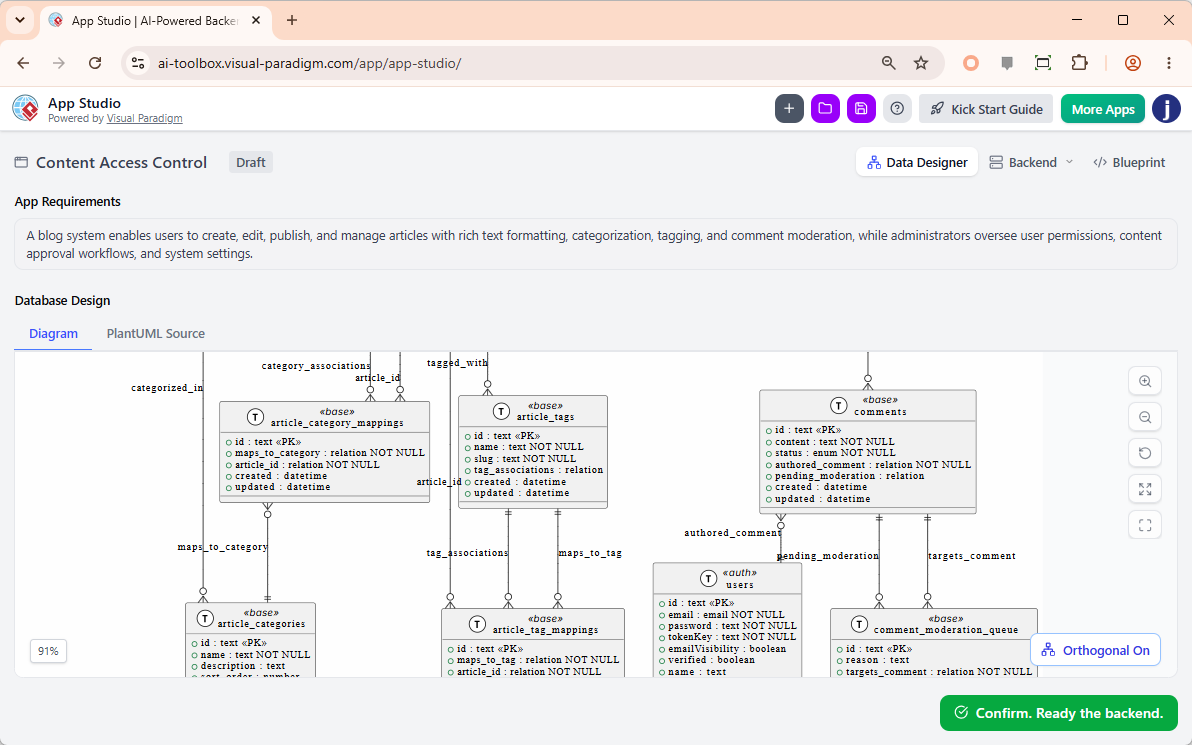
The intelligent engine instantly processed my description and visualized a complete database structure on my screen. It automatically mapped out all the necessary data fields, tables, and relationships without me writing a single line of database code. Seeing the ERD materialize from my simple description was genuinely impressive.
3. Deploy the Cloud Backend
With a single click, the platform automatically built, secured, and hosted a live cloud backend for my app. It instantly set up data storage, configured active data APIs, and generated my admin login credentials. I skipped hours of manual server configuration.
4. Create the Frontend Prompt
Finally, the system automatically packaged my live backend architecture, API endpoints, and design rules into a production-ready master prompt. I simply copied this prompt and pasted it into Google AI Studio to generate a fully functioning, stable frontend application.
Why I Chose App Studio: The Real Benefits
Total Freedom, No Vendor Lock-In
This was a game-changer for me. Unlike traditional app builders that trap you inside a closed, rigid system, App Studio gives you complete ownership. They handle the heavy lifting of the database backend but leave the frontend entirely up to me and my favorite AI coding environments. I wasn’t locked into their ecosystem.
Zero Database Coding Required
I don’t need to be a database engineer to build a production-ready application. Whether I wrote a description in plain English or uploaded a blueprint, the system automatically structured, connected, and mapped my data flawlessly. This alone saved me days of work.
Instant Cloud Deployment
I skipped the headache of server management, cloud configuration, and API setups. With a single click, App Studio provisioned a secure cloud database and generated active data endpoints for my application instantly.
Part 1: My Journey Through Visual Paradigm App Studio
Getting Started
Visual Paradigm App Studio is an innovative, AI-powered prompt engineering workspace. Unlike conventional app builders, it adopts a data-driven approach. It helped me design a production-ready database schema and then generated a comprehensive AI prompt containing all the backend logic, database connection details, and frontend specifications needed to build my app in Google AI Studio.
1. Accessing App Studio
I navigated to the Visual Paradigm App Studio at https://ai-toolbox.visual-paradigm.com/app/app-studio/.
2. Login and License Verification
I logged into my Visual Paradigm account by clicking the avatar icon in the top right corner and selecting “Login.” A valid license for either Visual Paradigm Online Combo Edition or Visual Paradigm Desktop Professional Edition (or higher) is required to access App Studio.

3. Defining My Application Requirements
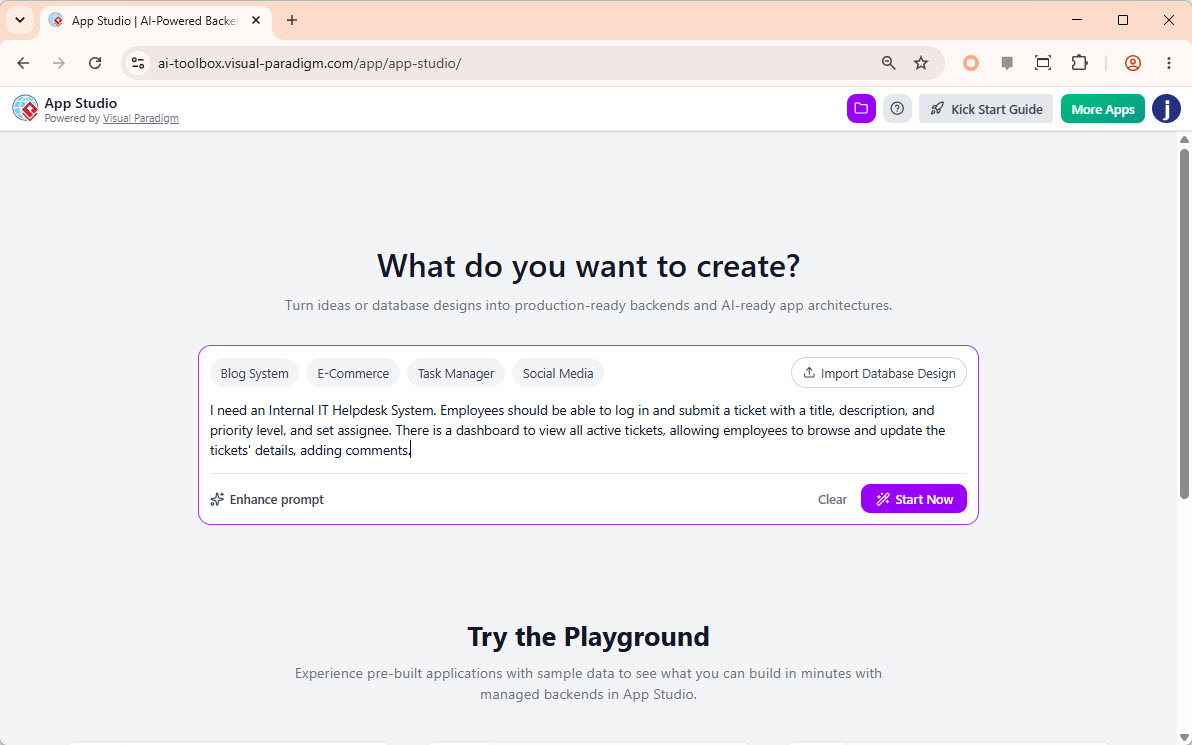
The first step was describing the application I wanted to build. In my case, I created an Internal IT Helpdesk System. I entered the following detailed description into the input box on the App Studio index page:
“I need an Internal IT Helpdesk System. Employees should be able to log in and submit a ticket with a title, description, priority level, and an assignee. There should be a dashboard to view all active tickets, allowing employees to browse and update ticket details, including adding comments.”
Pro Tip: If you’re unsure how to write a comprehensive description, you can write a brief one and use the “Enhance Prompt” button to let the AI enrich it for you.
4. Initiating the Process
After entering my description, I clicked the “Start Now” button. (Alternatively, you can start by importing a database design using PlantUML if you already have a pre-planned data model. This is ideal for more complex projects or when you want to ensure a specific data structure from the outset.)
5. AI-Driven ERD Generation
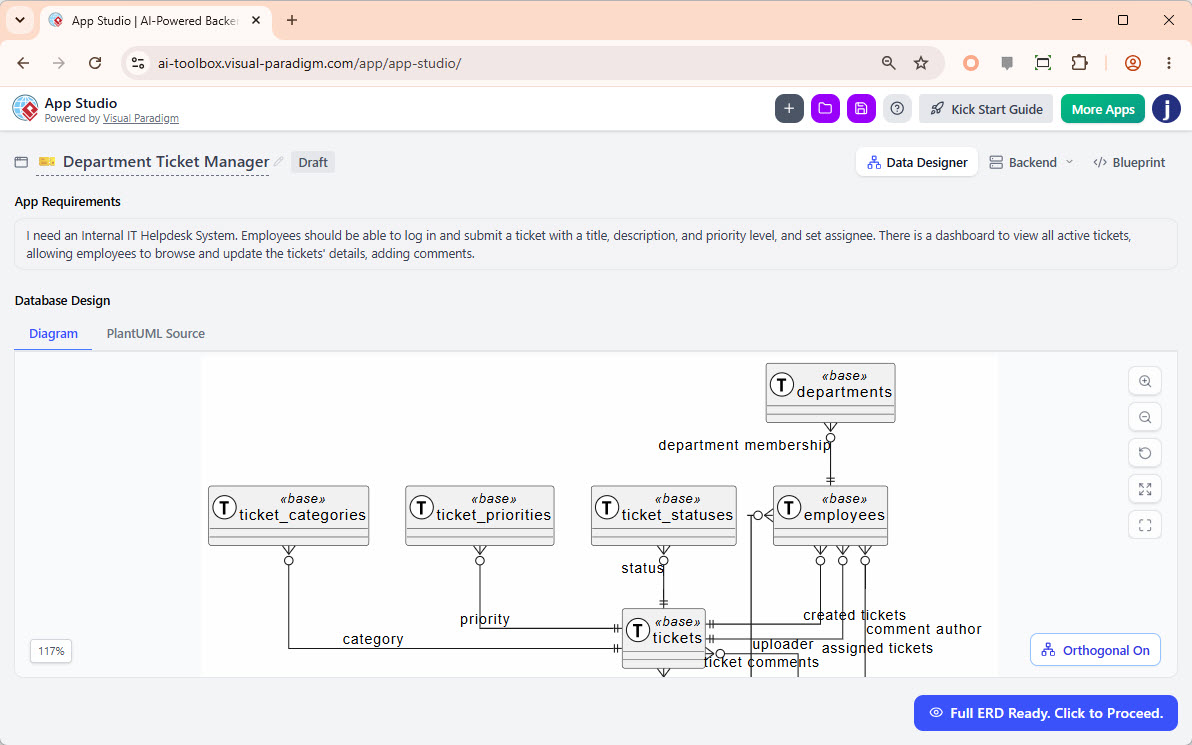
Once I clicked “Start Now,” the AI analyzed my requirements and generated an initial Entity-Relationship Diagram (ERD). Initially, the diagram showed the entities without their columns. I waited a few moments while the AI processed and generated the full structure.
6. Reviewing and Confirming the Data Model
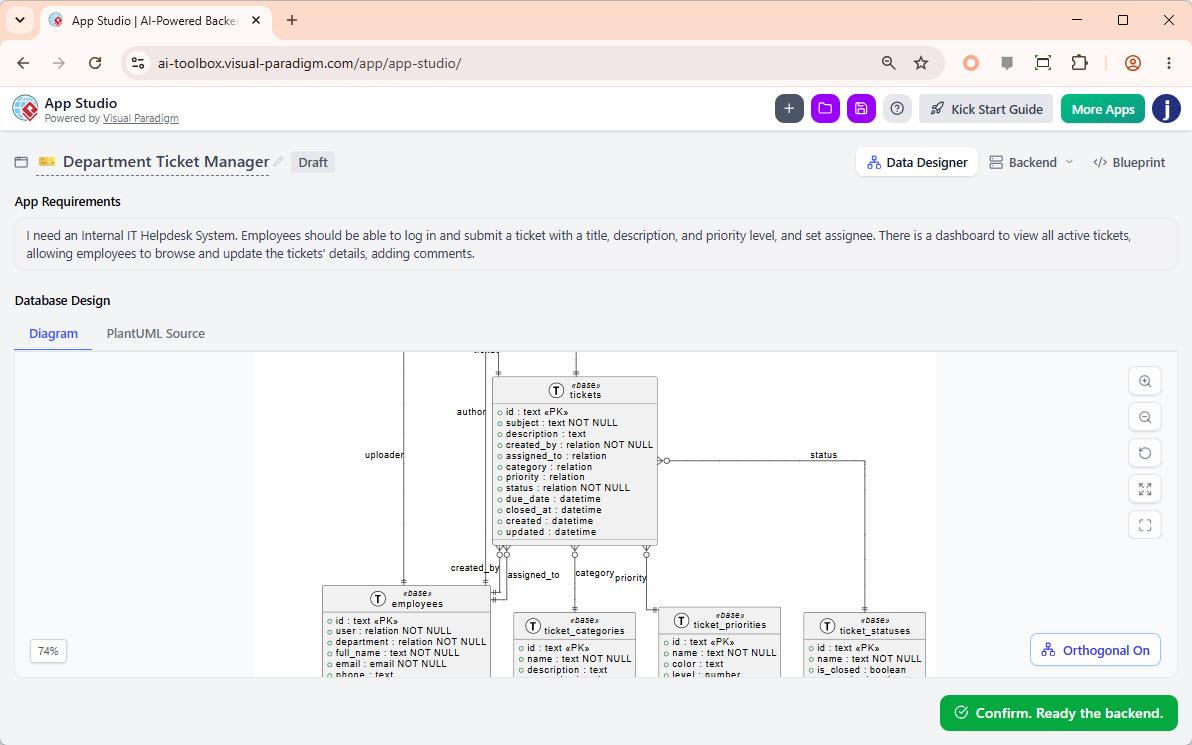
When the AI finished, a button labeled “Full ERD Ready. Click to Proceed” appeared in the bottom right corner. I clicked this button to view the complete ERD with all tables and columns populated. I carefully reviewed the diagram to ensure the data model accurately reflected my application’s needs. Everything looked correct, so I clicked “Confirm, Ready the backend.”
7. Setting Up the Database Backend
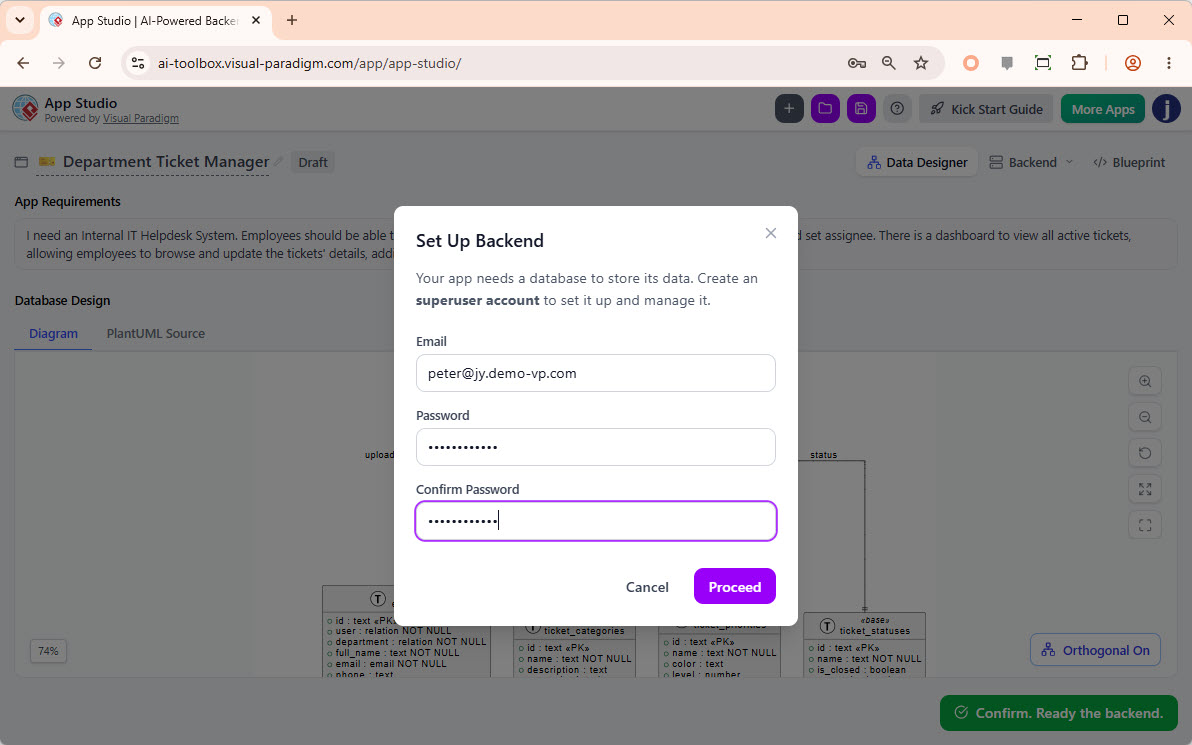
A dialog box titled “Set Up Backend” appeared. My application required a database to store its data. App Studio provisioned a managed database for me. I entered my preferred email address and password to create a superuser account for my app’s database and clicked “Proceed” to continue.
8. Database Provisioning and Data Seeding
App Studio took a few seconds to set up my database. Once complete, the AI automatically generated and inserted some sample records into my database tables. This feature was invaluable for testing and exploring my application’s functionality with pre-existing data. I could always delete, modify, or add to this data later using the built-in database management tools.
9. Customizing My Application Blueprint
I was brought to the “Blueprint” page.
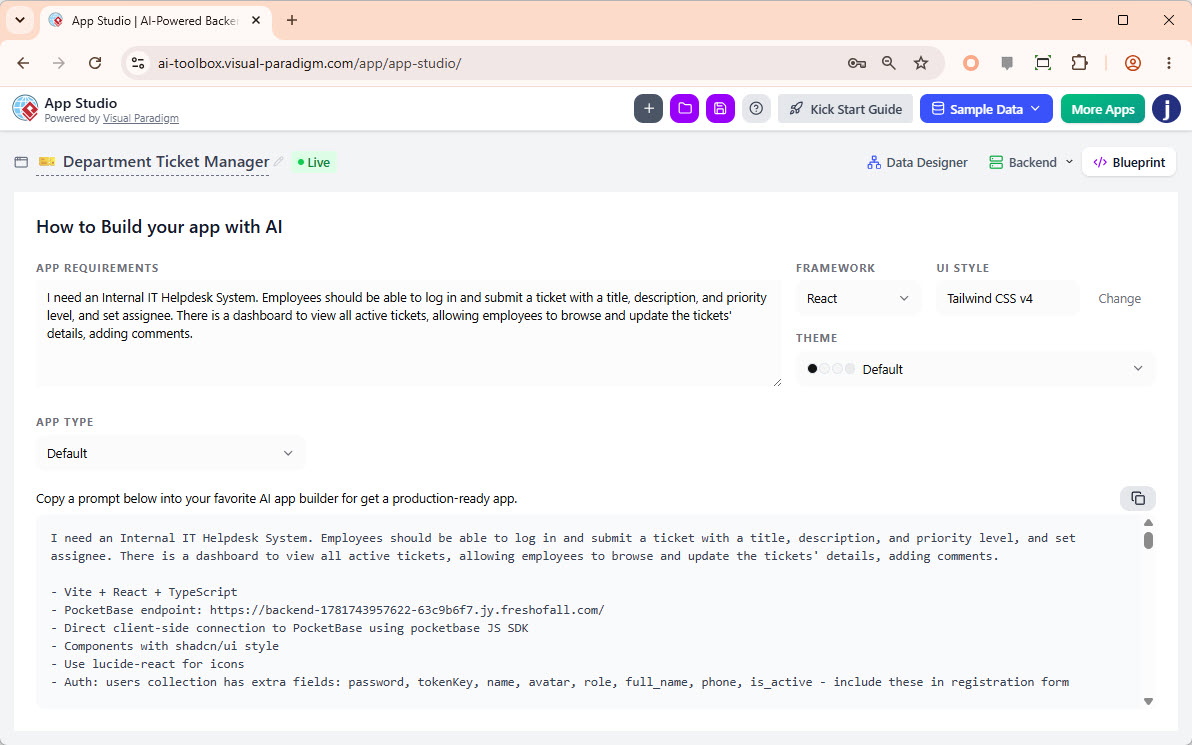
This is where I could fine-tune the parameters that would influence the final AI prompt. Before copying the prompt, I configured the following options:
-
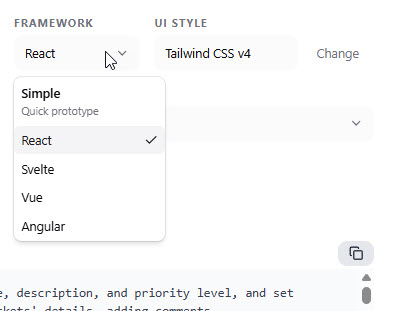
Framework: I selected my preferred frontend framework. Options include Simple, React (Default), Svelte, Vue, and Angular. For my project, I kept the default React.
-
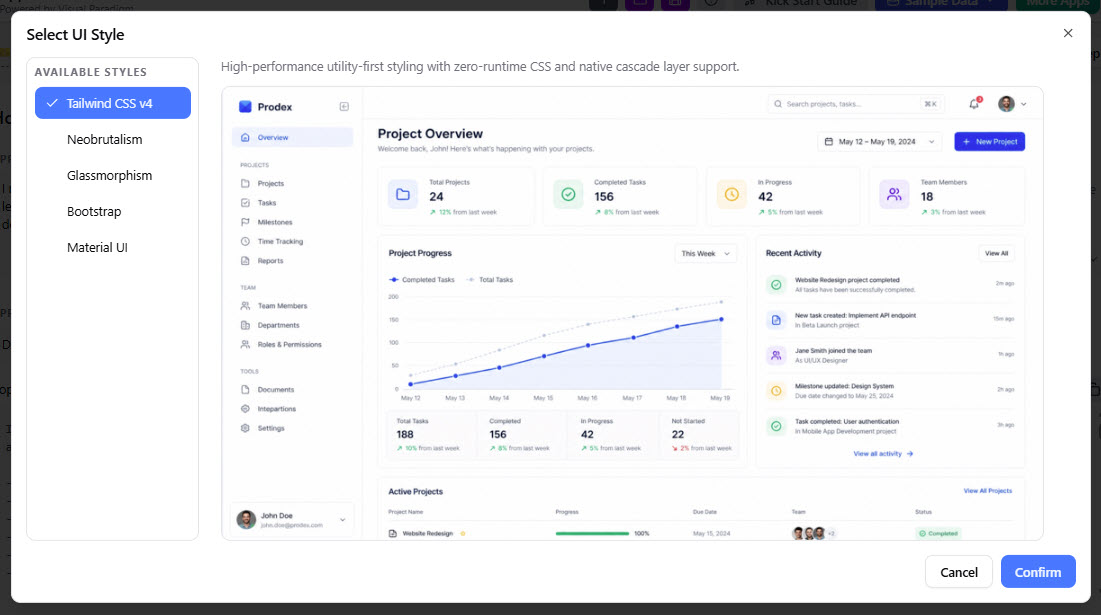
UI Style: I clicked on the “UI Style” field to open a preview dialog and selected from various styles like Tailwind CSS v4 (Default), Neobrutalism, Glassmorphism, Bootstrap, or Material UI. I stuck with Tailwind CSS v4.
-
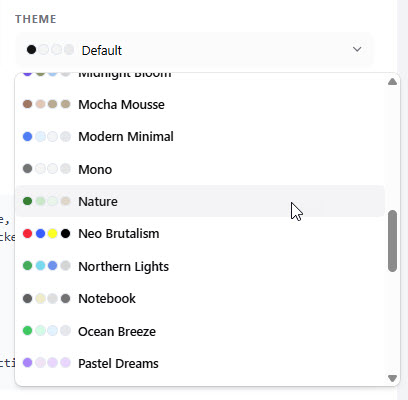
Theme: I chose a color palette for my application. I selected the “Nature” palette for a clean, professional look.
-
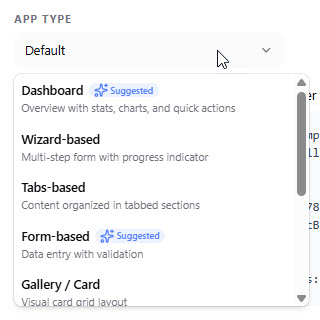
App Type: I selected a layout type to better control the app’s behavior and user interface. Options include Default, Wizard-based, Tabs-based, Form-based, Gallery/Card, List/Table, List with Details, Calendar, and Kanban. I left the default “Default” selected.
10. Copying the Production-Ready AI Prompt
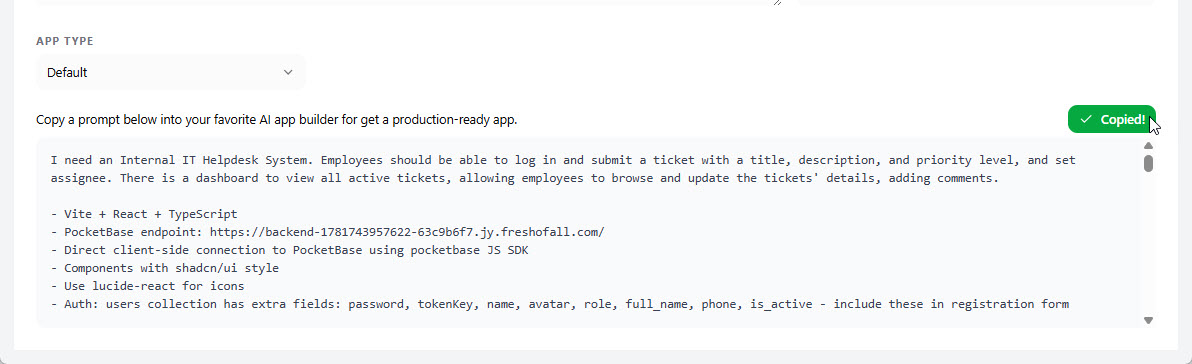
Once all parameters were set, I clicked the “Copy” button. This copied a comprehensive AI prompt to my clipboard. This prompt encapsulated my application requirements, the selected parameters, the complete data schema, database configuration, and business logic. I was now ready to use this prompt in my chosen AI app-building platform.
Part 2: Building My App in Google AI Studio
With the AI prompt generated by App Studio, I used Google AI Studio to build the actual application. Google AI Studio is a powerful platform that translates natural language prompts into functional web applications.
1. Starting a New App Project
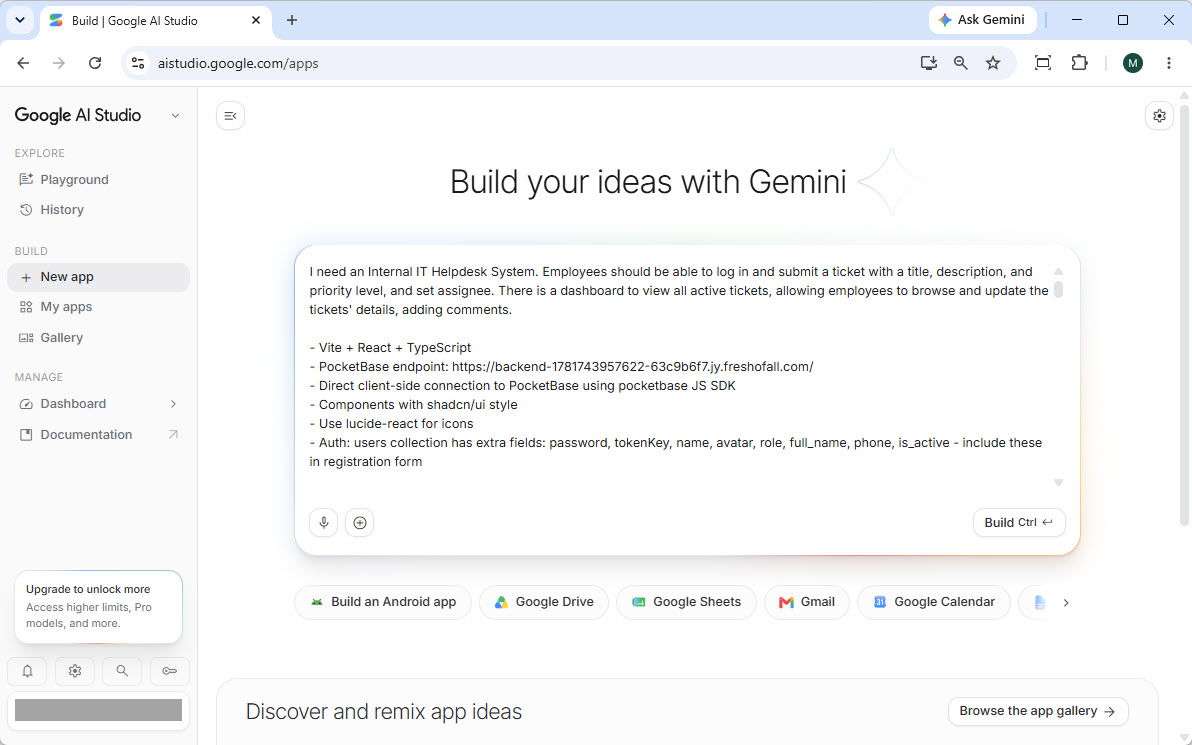
I opened Google AI Studio and created a new app project. I pasted the prompt I copied from App Studio directly into the prompt input area. I made the prompt inline to provide full context to the AI, rather than attaching it as a file.
2. Initiating App Building
I simply clicked the “Build” button to start the process. There was no need to edit or modify the prompt; it was already production-ready and contained all necessary instructions.
3. App Generation
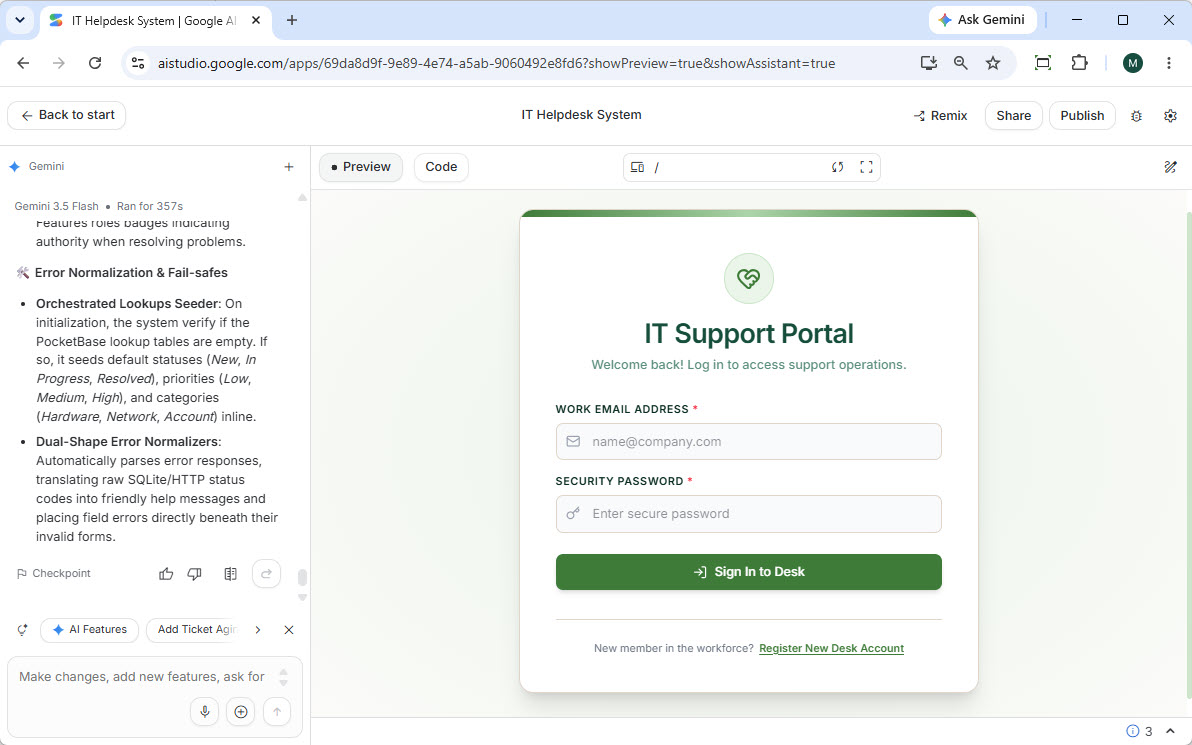
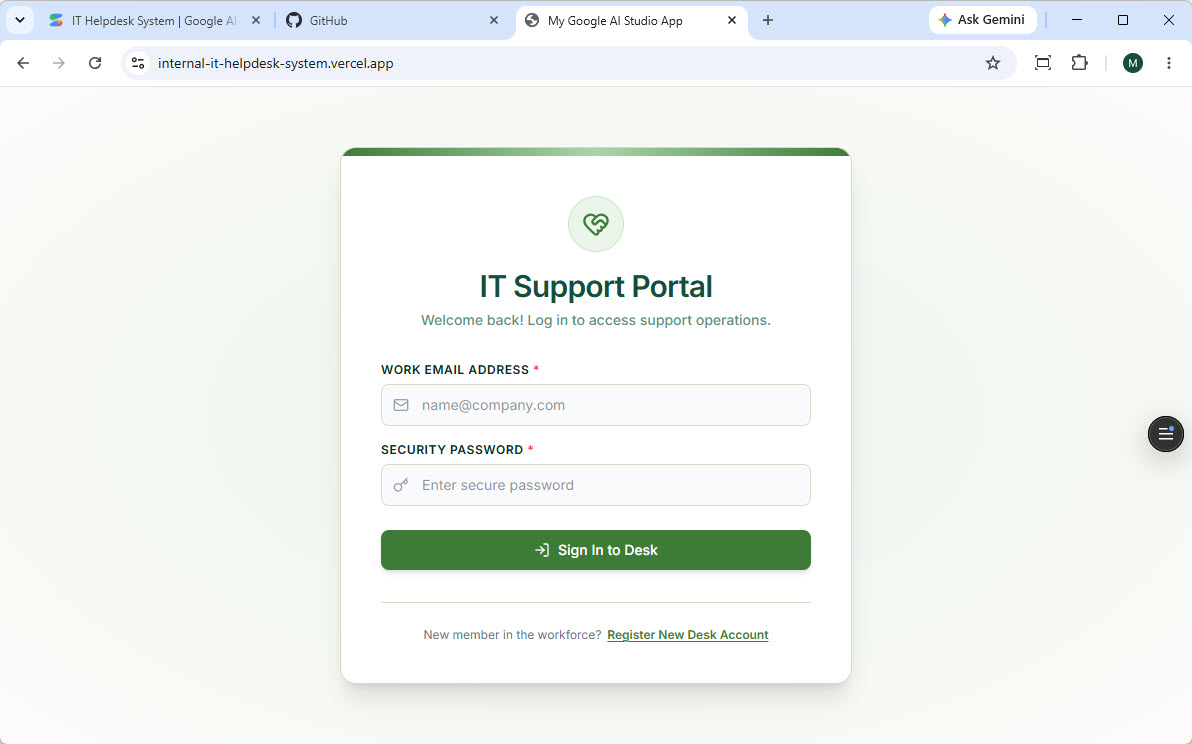
Google AI Studio took a few moments to process and build my application. Upon completion, I was presented with a fully functional, beautiful web application. Since I was building an Internal IT Helpdesk System, I first saw the login screen.
4. Testing the Application
I tested the core functionality:
-
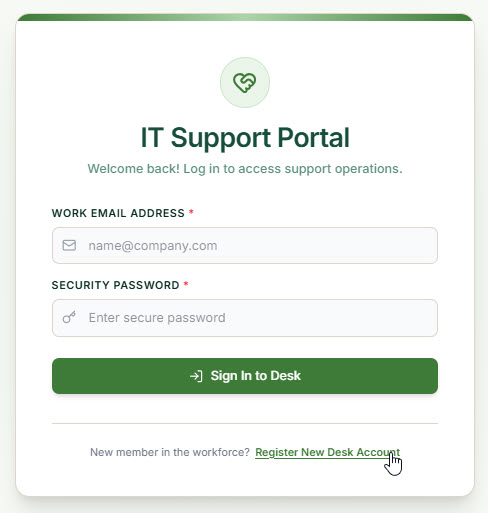
Creating a User: I clicked on “Register New Deck Account” located at the bottom of the login form.
-
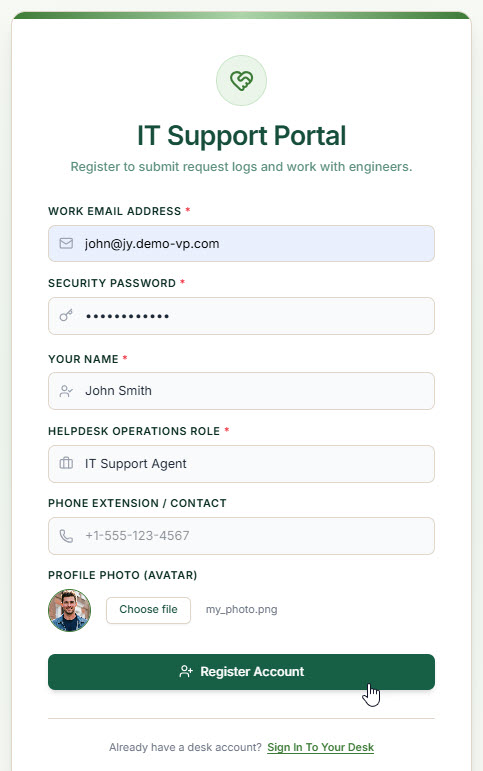
Entering User Information: I filled in the required information for the new user account and proceeded.
-
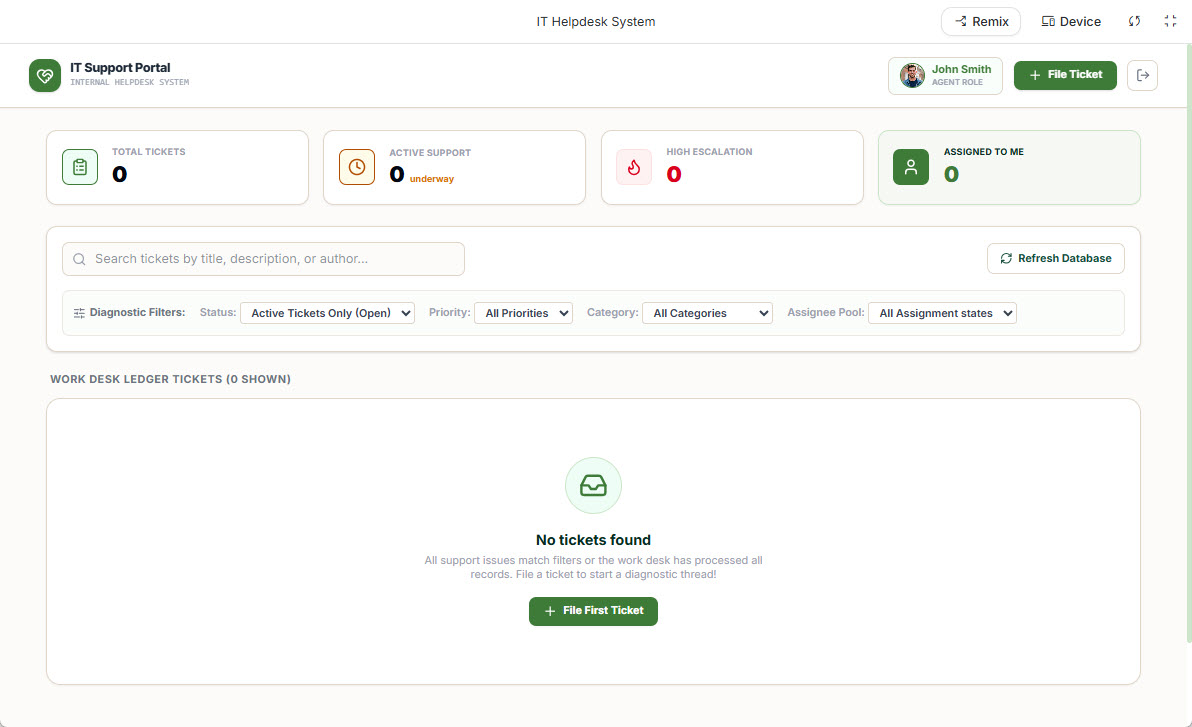
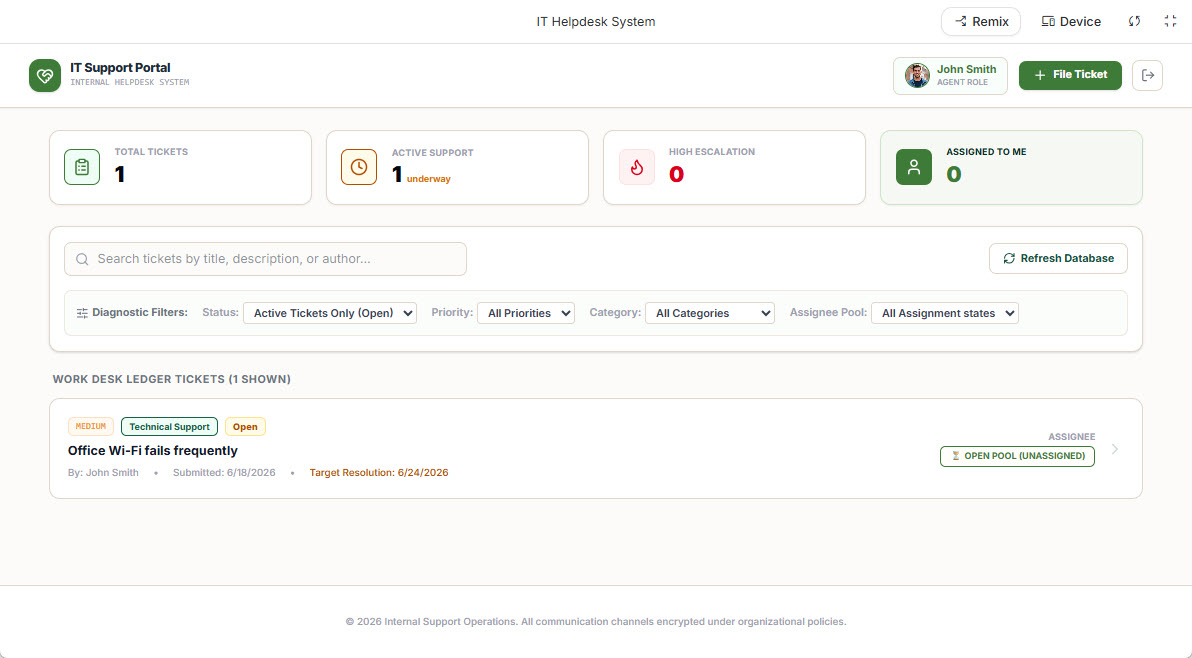
Login and Dashboard: After successful registration, I was logged in automatically and directed to a beautiful, functional dashboard.
-
Creating a New Ticket: I clicked on the “File Ticket” button, typically located at the top right of the interface. I filled in the ticket details, including the title, description, priority, and assignee. I noticed the “Category” field, which was a lookup field pre-populated with sample data generated by App Studio. This sample data was useful for testing, but I knew I’d want to clear it before launching my app.
-
Submitting Ticket: I clicked “File Ticket & Submit.” The new ticket was successfully created and appeared in my dashboard’s ticket list.
Part 3: Managing My Application’s Database
Before deploying my application to production, I needed to review and clean up the database. App Studio provided an intuitive database management interface for this purpose.
1. Accessing Database Management
I returned to the Visual Paradigm App Studio interface.
2. Opening the Backend Console
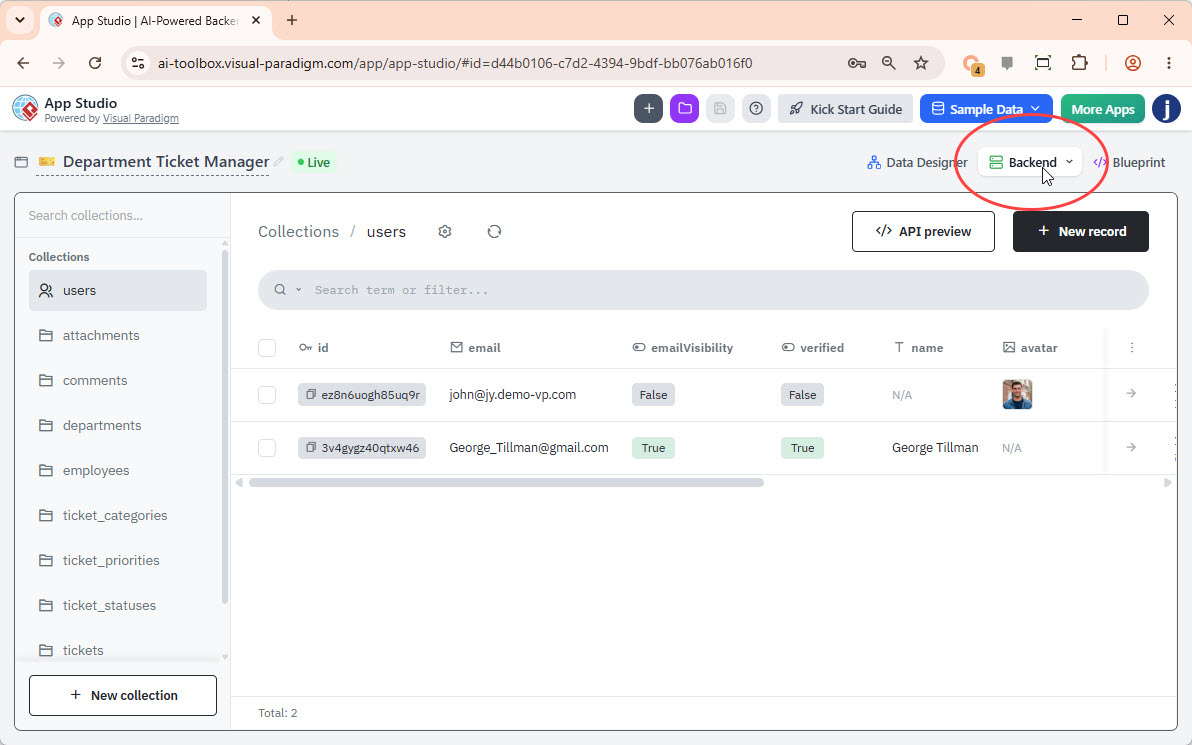
I clicked the “Backend” button located at the top right of the screen. This led me to the database management console.
3. Managing Records
The database management screen displayed all my tables on the left. Clicking on any table showed its records on the right. I could:
-
Select individual records for deletion.
-
Click on “New record” to add new data.
-
Edit existing records by clicking on the fields.
Any changes I made here were instantly reflected in my live application, as it was directly connected to this managed database. This was the perfect time to remove or modify sample data and set up any necessary lookup tables (e.g., categories, priorities) with my production data.
Part 4: Deploying My App to Production with Vercel
The final step was deploying my application, making it accessible to my users. For this guide, I used Vercel, a popular platform for hosting frontend applications. Deployment can be done in several ways; I demonstrated the process using a Git repository (GitHub) integration.
4.1 Syncing from Google AI Studio to GitHub
1. Returning to Google AI Studio
I went back to my project in Google AI Studio.
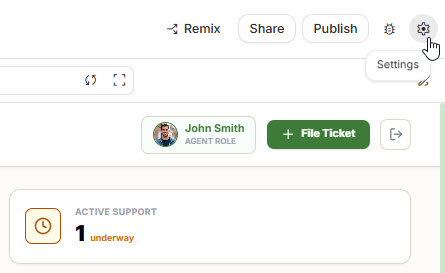
2. Opening Settings
I clicked on the Settings button (gear icon) located in the top right corner of the interface.
3. Connecting GitHub
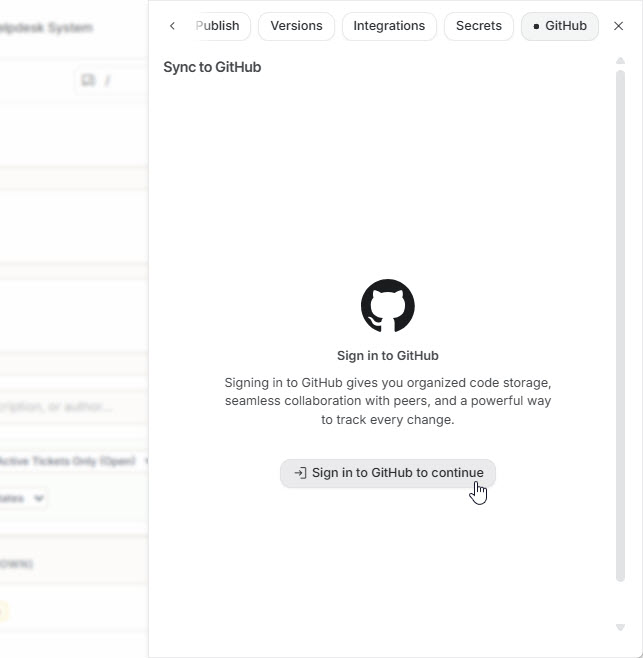
I navigated to the “GitHub” tab and clicked “Sign in to GitHub” to authorize and install the Google AI Studio integration.
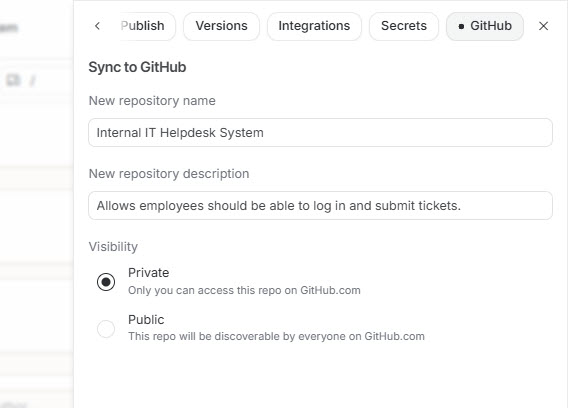
4. Creating a Repository
I entered a name and description for my repository, chose its visibility (public or private), and clicked “Create GitHub repository.”
5. Committing Changes
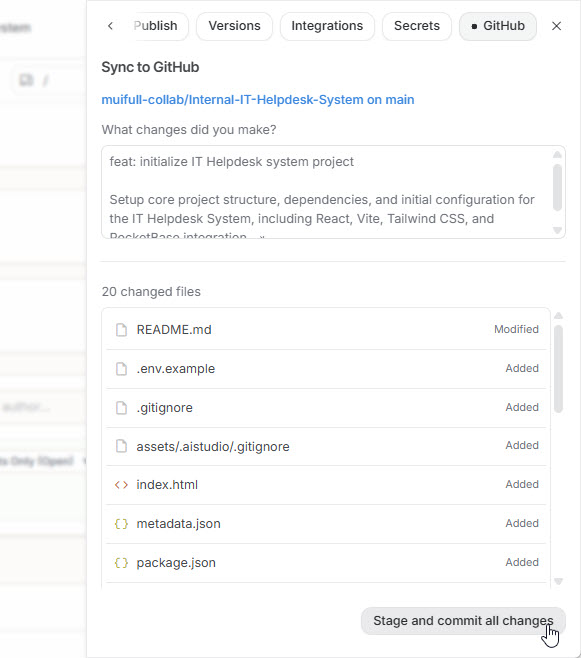
Google AI Studio synced my project files to the new GitHub repository. I reviewed the changes and clicked “Stage and commit all changes.” I received a confirmation when the synchronization was complete.
4.2 Deploying My App to Vercel
1. Creating a Vercel Account
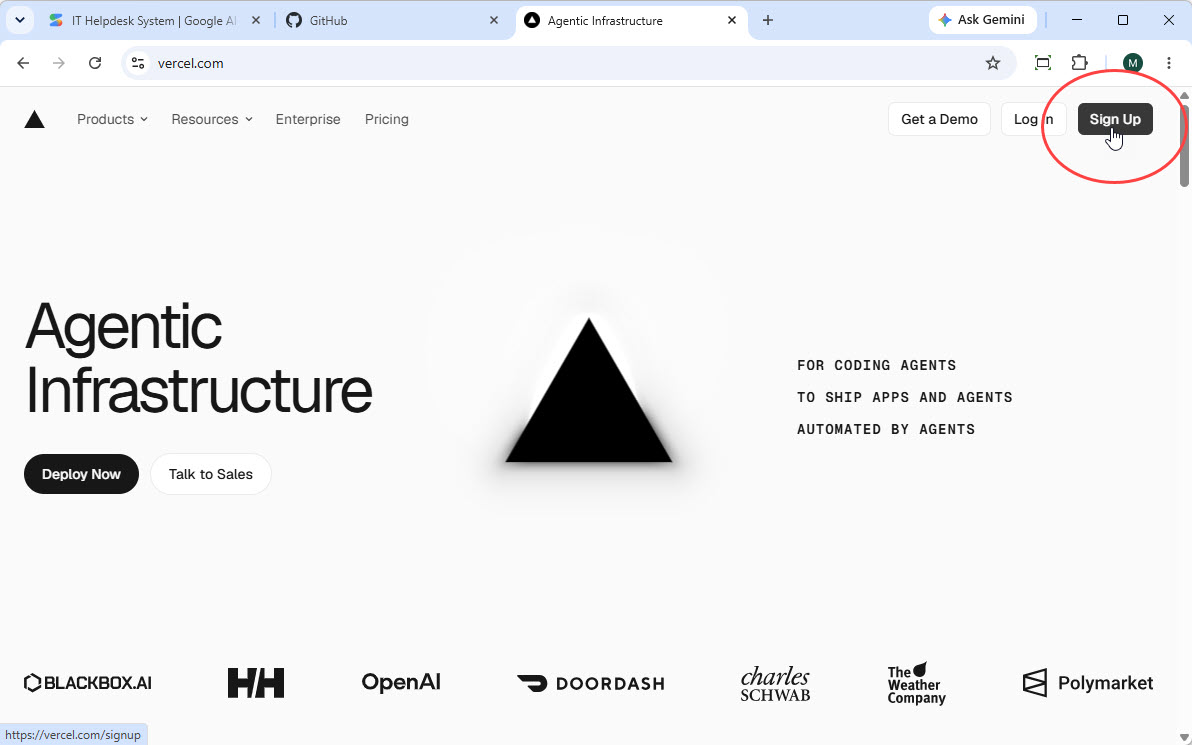
I went to vercel.com and clicked “Sign up”. I recommended signing up with your GitHub account for seamless integration.
2. Authorizing Vercel
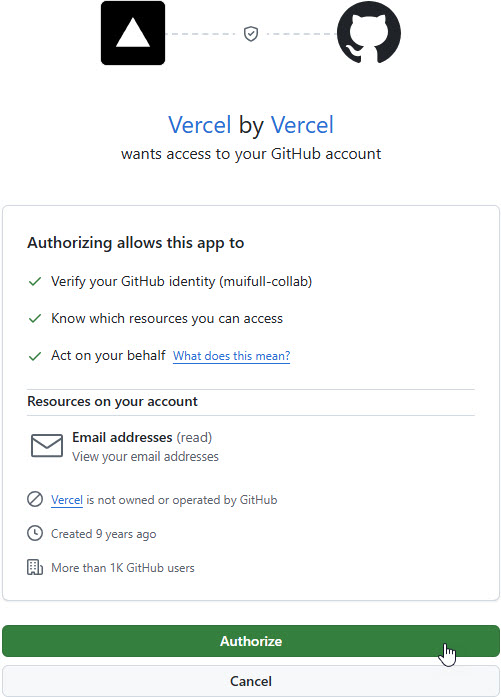
I allowed Vercel to access my GitHub account when prompted.
3. Importing My Git Repository
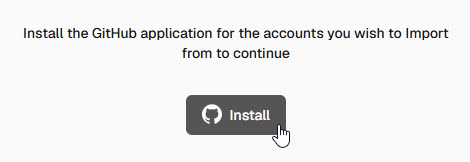
On my Vercel dashboard, I selected the option to import a Git repository. I clicked “Install” to install the Vercel GitHub application for my account.
4. Selecting My Repository
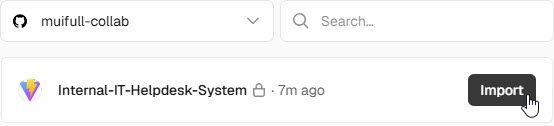
My GitHub repository was listed. I clicked “Import” on the repository I just created.
5. Configuring and Deploying
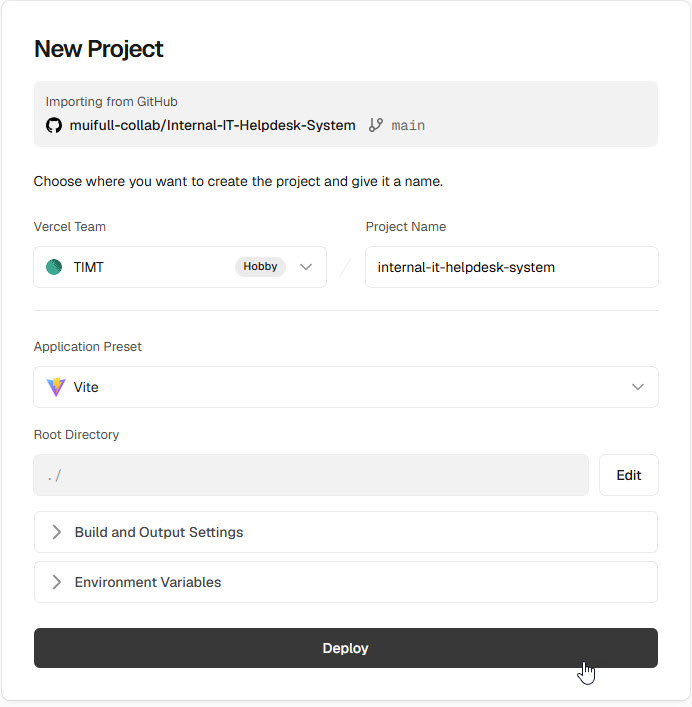
Vercel automatically detected the project settings. I clicked “Deploy.”
6. Deployment Complete
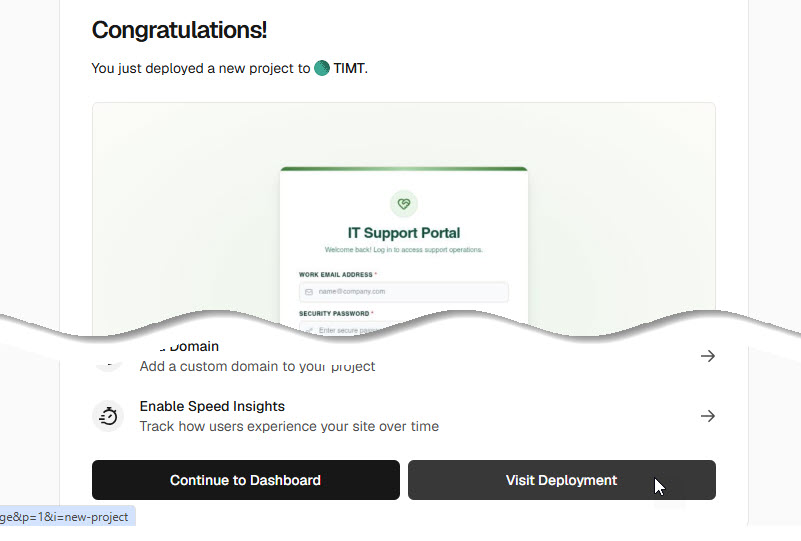
Vercel built and deployed my application. Once the process was complete, I clicked “Visit Deployment” to view my live, production-ready Internal IT Helpdesk System.
Congratulations! I successfully built and deployed a fully functional, production-ready application using Visual Paradigm App Studio, Google AI Studio, and Vercel. This workflow demonstrated the power and efficiency of AI-driven development, significantly accelerating the time-to-market for custom internal tools and business applications.
My Assessment: Key Benefits of This Data-Driven AI Approach
After completing this project, here are the benefits I experienced:
Data-Driven Development
By starting with the data model, I ensured my application was built on a solid, scalable foundation. This approach reduced technical debt and improved long-term maintainability. I wasn’t painting myself into a corner with poor data architecture.
Production-Ready Database Management
App Studio automatically provisioned and managed a real database for me, complete with a superuser account, eliminating the complexity of manual database setup and configuration. This alone saved me countless hours.
Accelerated Time-to-Market
The combination of AI prompt generation and app building drastically reduced development time. I went from idea to deployment in hours, not weeks or months. This was the most impressive aspect of the entire experience.
Hassle-Free Backend Integration
The generated prompt included all database connection details and business logic, so I didn’t need to worry about API setup or backend connectivity when building my app in platforms like Google AI Studio.
Customizable Frontend
The flexible prompt builder allowed me to tailor the UI/UX of my application by selecting frameworks, UI styles, themes, and app types to match my branding and user needs. I wasn’t stuck with a one-size-fits-all solution.
All-in-One Platform
App Studio served as a single source of truth for my database design, database administration, and application prompt generation, streamlining the entire development process.
Conclusion: My Honest Verdict on Visual Paradigm AI App Studio
After building and deploying a complete Internal IT Helpdesk System from scratch, I can confidently say that Visual Paradigm AI App Studio delivers on its promises—and then some.
What Impressed Me Most
Speed Without Sacrifice: The most striking aspect was how quickly I moved from concept to production. What would have traditionally taken weeks of development, database design, API configuration, and frontend coding was accomplished in a single afternoon. But this wasn’t a rushed, fragile prototype—it was a production-ready application with proper database architecture and clean code.
The Data-First Approach Works: I was initially skeptical about starting with the database model rather than the UI, but this approach proved its worth. By establishing a solid data foundation first, I avoided the common pitfall of building beautiful interfaces that couldn’t support the underlying business logic. The ERD generation was accurate, and the AI clearly understood relational database design principles.
True Flexibility: Unlike other low-code platforms I’ve tested, I didn’t feel trapped. The ability to export my work to Google AI Studio and deploy via Vercel meant I maintained ownership and flexibility. I could continue development using my preferred tools and workflows.
Areas for Consideration
Learning Curve: While the platform is intuitive, there is a learning curve if you’re not familiar with database concepts. Understanding entities, relationships, and normalization helps you get the most out of the tool.
License Requirement: You need a valid Visual Paradigm license (Online Combo Edition or Desktop Professional Edition or higher), which is an investment. However, considering the time savings, it pays for itself quickly.
Sample Data Cleanup: The automatic sample data generation is helpful for testing but requires cleanup before production deployment. This is a minor inconvenience but worth noting.
Who Should Use This Platform?
Based on my experience, Visual Paradigm AI App Studio is ideal for:
-
IT departments needing to rapidly prototype internal tools
-
Startups wanting to validate ideas quickly without heavy development investment
-
Business analysts who understand requirements but lack deep coding expertise
-
Development teams looking to accelerate their workflow and reduce boilerplate coding
-
Consultants who need to deliver solutions quickly to clients
Final Thoughts
In an era where speed and agility are competitive advantages, Visual Paradigm AI App Studio represents a significant leap forward in rapid application development. It doesn’t replace skilled developers, but it empowers them to focus on what matters—solving business problems rather than wrestling with infrastructure.
My IT Helpdesk System is now live, functional, and being used by my team. The entire process—from initial concept to deployed application—took less than a day. That’s not just impressive; it’s transformative.
If you’re on the fence about trying AI-powered development tools, I’d say this: take the leap. Visual Paradigm AI App Studio has earned a permanent place in my development toolkit, and I’m already planning my next project with it.
Ready to build your own app? Get started at https://ai-toolbox.visual-paradigm.com/app/app-studio/ and see what you can create in a single afternoon.
This review is based on hands-on experience building a production application. All screenshots and examples are from an actual deployment. Results may vary based on application complexity and user requirements.
Reference
- Introducing Visual Paradigm AI App Studio: A groundbreaking visual engineering solution that guarantees the structural integrity of AI-generated applications by acting as an automated data architect to create secure, production-ready application foundations from natural language or ERDs.
- Digital App Studio: An intelligent data architect for AI generation that solves the problem of stateless AI apps by provisioning live, hosted cloud databases and generating data-driven master prompts for stable, persistent applications.
- The All-New AI App Studio: A tool that enables users to build stable applications quickly by first creating a solid data foundation, automatically building the backend database structure, and generating a perfect coding blueprint for external AI tools to follow.
- Introducing Visual Paradigm 18.1: A New Era of Unified Ecosystems and AI-Driven Innovation: An official announcement for the release of Visual Paradigm Version 18.1, a significant update that unifies desktop and cloud environments into an integrated ecosystem powered by advanced, production-ready AI tools.
- Visual Paradigm Pricing: A detailed overview of Visual Paradigm’s subscription plans (Enterprise, Professional, Standard, and Modeler), explaining that purchasing a desktop license provides free access to online features like AI-powered apps, chatbots, and web diagram editors.